Subversion is great. Really, I should say that using code management is a great idea; I just happen to use Subversion. I have been involved with iOS and Cocoa development over the last couple of years and find Subversion to be valuable when working solo or as part of a team.
This post will explain how to get your Xcode 4 project into Subversion. There is a lot to Subversion and I do not intend to cover it all here. I merely intend to get you going.
At time of writing, I am using Xcode 4.3.4 on Mac OS X 10.7 Lion. You will need a subversion system; this may be accessed via HTTP or on the local file system. The screen shots shown here display settings used to connect to a Subversion system at Staffordshire University over HTTP. If you are a Staffordshire University student, ask your tutor regarding availability for your module or project.
You will need the following:
- Xcode 4.3.4 (it will likely work with later versions)
- Subversion repository details (ask your tutor or technical support for details)
- An Xcode project to import into Subversion.
Creating the Repository
Open Xcode and click ‘Repositories’ from ‘File/Source Control…’ menu item.
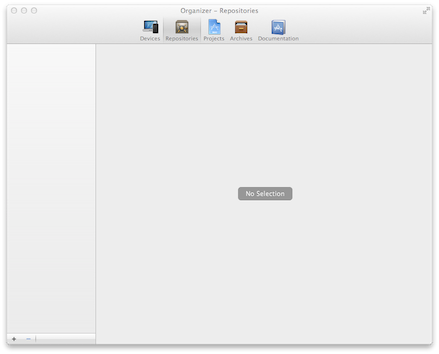
Click the ‘+’ icon at the bottom-left of the window and click ‘Add Repository’.
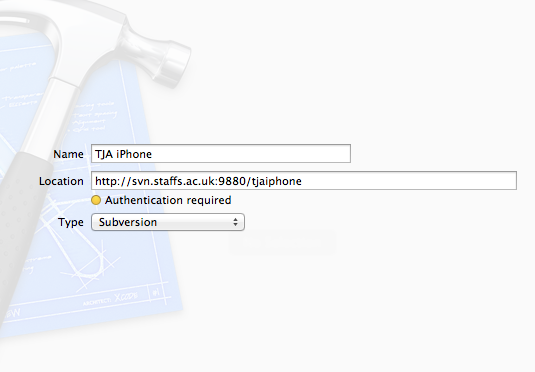
You will then need to enter the details of your Subversion repository. It is likely that your repository, if accessed remotely, will require authentication. Set the type to Subversion and click ‘Next’.
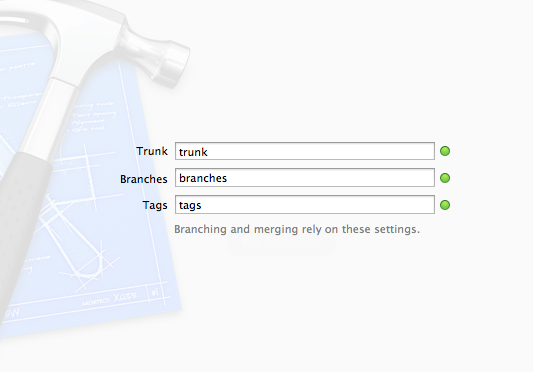
You will then be prompted to configure the trunk, branch and tag settings. You will see green light if the settings are valid. The Subversion server used for the purpose of screen shots supplied these settings. If you do not see a green light by each text box, you will not be able to take advantage of these features. At a minimum, you probably want a trunk folder.
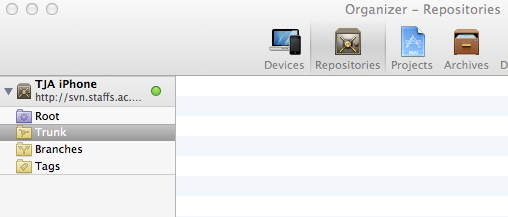
Once this has been confirmed, your repository will be available in the main repository view.
Import a Project
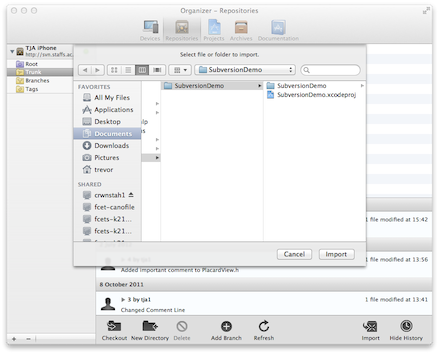
Select the ‘Trunk’ entry in your configured Subversion repository. An import icon will be available toward the bottom-right of the window; click it.

Select the folder that contains the Xcode project that you wish to import into your Subversion repository. Confirm your choice. You may be required to provide a comment along with your imported project.
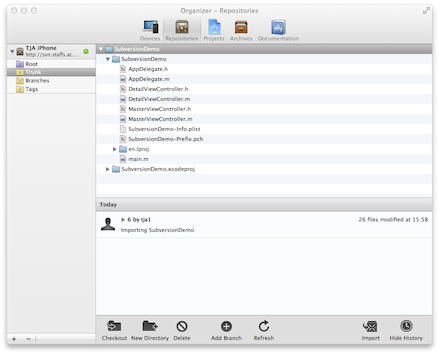
Congratulations! You have subjected your Xcode project to Subversion. To get using it immediately, select the high level folder of the project. Click ‘Checkout’. When prompted, select a place to work on your checked files and open the project when prompted.
Further Information
If you are new to Subversion, you should read a general overview of the technology. There is an excellent tome of Subversion knowledge available that is free (as in beer) of charge at the Home of Version Control with Subversion. A lot of people think Subversion is for software development in groups. While it is certainly useful for group development, it also presents compelling reasons to use it for all of your coding projects, solo or otherwise. Read Jim Priest’s article on why he uses Subversion.
One reply on “Importing an Xcode Project into Subversion”
I confirm that this post is also relevant and correct for Mountain Lion OS X 10.8 and Xcode 4.4.