I have recently picked up a project to be created using PHP. It has been great to get back into PHP as I have not used it in a while (since PHP 4.3). For some reason, web sharing was removed from OS X Mountain Lion; removing the one click activation of Apache. PHP is still there and can be configured easily from the terminal. This post explains how to activate PHP, Pear and Xdebug using the system installation.
For convenience, I recommend using a separate stack for development, such as MAMP. I shall post about that later.
Install Xcode
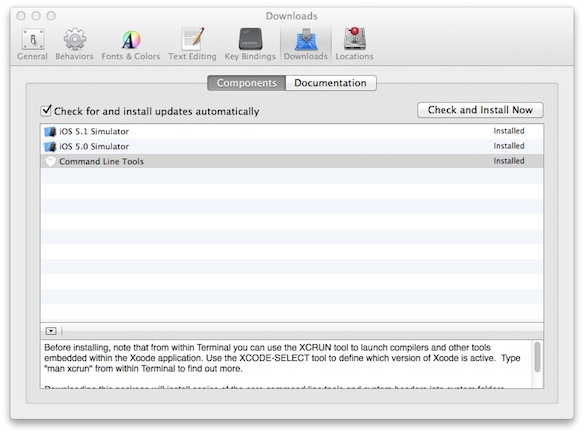
If you intend to develop on your Mac then I recommend installing Xcode from the App Store. Once you have Xcode installed, launch the program and go to preferences. Click on the Downloads tab install the Command Line Tools. This will make compilers available, such as gcc, for building extensions and packages.
Configure PHP
Use the default initialisation file and copy it to the same directory as ‘php.ini’. You will need to provide your administrative account password for sudo commands.
$ sudo cp /private/etc/php.ini.default /private/etc/php.ini
You should now be able to execute php with the -v switch to get the current version and determine that it is installed.
Configure Pear
Execute the Pear PHP archive using the following:
$ sudo php /usr/lib/php/install-pear-nozlib.phar
Point Pear and Pecl programs to the PHP initialisation file:
$ pear config-set php_ini /private/etc/php.ini
$ pecl config-set php_ini /private/etc/php.ini
Finally, get Pear to upgrade itself and all of its packages.
$ sudo pear upgrade
Install and Configure Xdebug
From the terminal prompt, get Pecl to install Xdebug.
$ sudo pecl install xdebug
Pecl will install Xdebug as an extension and create a new line in your php.ini file referencing the extension. This will not work correctly as Xdebug needs to be loaded as Zend extension. This can be corrected with a brief and simple change to php.ini.
$ sudo pico /etc/php.ini
Change the line at the top that starts with ‘extension’ to:
zend_extension="/usr/lib/php/extensions/no-debug-non-zts-20090626/xdebug.so"
Save php.ini and you should now have a working PHP with Xdebug using Mountain Lion.